Posted: 4/11/2023
Message brokers are an essential part of modern application architecture. They help to decouple the different components of an application, making it easier to build and maintain complex distributed systems. In this blog post, we’ll explore how to set up a message broker using RabbitMQ and Docker in .NET 7.
Source code: https://github.com/kubawajs/MessageBroker
Project setup
Start by creating a new project with the ASP.NET Core Web API template. Remove the example template endpoint from Program.cs and add another simple endpoint:
// Message broker example
app.MapGet("/api/messages", () =>
{
    return "Hello";
});
This simple endpoint just displays the text “Hello” on the browser. We’ll extend it in the further parts of this blog post.
Package installation
Now it’s time to install the RabbitMQ packages, which will allow us to publish messages to the message broker. We need only one - MassTransit.RabbitMQ.

Register it with the built-in extension method in Program.cs:
// Configure message broker
builder.Services.Configure<MessageBrokerSettings>(app.Configuration.GetSection(MessageBrokerSettings.SectionName));
builder.Services.AddSingleton(sp => sp.GetRequiredService<IOptions<MessageBrokerSettings>>().Value);

builder.Services.AddMassTransit(busConfigurator =>
{
    busConfigurator.SetKebabCaseEndpointNameFormatter();
    busConfigurator.UsingRabbitMq((context, configurator) =>
    {
        var settings = context.GetRequiredService<MessageBrokerSettings>();
        configurator.Host(new Uri(settings.Host), host =>
        {
            host.Username(settings.Username);
            host.Password(settings.Password);
        });
    });
});
This code retrieves the connection string to RabbitMQ from appsettings.json (we’ll update it later) using MessageBrokerSettings class. Below you can find its implementation:
public sealed class MessageBrokerSettings
{
    public static string SectionName = "MessageBroker";

    public string Host { get; set; } = string.Empty;
    public string Username { get; set; } = string.Empty;
    public string Password { get; set; } = string.Empty;
}
Docker
Now it’s time to set up Docker containers for API and RabbitMQ. Start by clicking with RMB on the project in Visual Studio. Choose Add and then Container Orchestrator Support.

Next, select Docker Compose with Linux as the target OS.

Visual Studio will automatically generate Dockerfile for your API and Docker Compose file. Half of the work is done without any effort ;)

Let’s edit the compose file. The missing part is our RabbitMQ container. The code presented below will pull the latest image from the Docker registry and will use the local folder to store data (volumes section) so that the data contained in it will not be deleted when the container is removed. I’ve added also the dependency on the API container so we’ll be sure that the cache container is always initialized first.
The final code of the docker-compose file should look like the below:
version: '3.4'

services:
  messagebroker.api:
    container\_name: API
    image: ${DOCKER\_REGISTRY-}messagebrokerapi
    build:
      context: .
      dockerfile: MessageBroker.Api/Dockerfile
    ports:
      - 80:80
      - 443:443
    depends\_on:
      - messagebroker.rabbitmq

  messagebroker.rabbitmq:
    container\_name: RabbitMQ
    image: rabbitmq:management
    hostname: messagebroker-queue
    volumes:
    - ./.containers/queue/data/:/var/lib/rabbitmq
    - ./.containers/queue/log/:/var/log/rabbitmq
    environment:
      RABBITMQ\_DEFAULT\_USER: admin
      RABBITMQ\_DEFAULT\_PASS: admin
    ports:
    - 5672:5672
    - 15672:15672
The last thing to finish the setup is to add the RabbitMQ configuration into appsettings.json. It uses the hostname, username, and password defined in the Docker compose file:
"MessageBroker": {
    "Host": "amqp://messagebroker-queue:5672",
    "Username": "admin",
    "Password": "admin"
}
Publishing messages
Event Bus
To publish messages to the RabbitMQ instance, we need to create an object that will be responsible for this. Let’s start with creating an interface called IEventBus. It will have only one generic method - PublishAsync. As a parameter, it will take any object that can be passed as a message.
public interface IEventBus
{
    Task PublishAsync<T>(T message, CancellationToken cancellationToken = default)
        where T : class;
}
Now it’s time for interface implementation. It’s very simple - uses Publish method of the IPublishEndpoint interface from the MassTransit package. And that’s all - everything will automatically adapt to our message broker by the configuration we provided in the Program.cs file.
internal sealed class EventBus : IEventBus
{
    private readonly IPublishEndpoint \_publishEndpoint;

    public EventBus(IPublishEndpoint publishEndpoint) => \_publishEndpoint = publishEndpoint;

    public Task PublishAsync<T>(T message, CancellationToken cancellationToken = default) where T : class
        => \_publishEndpoint.Publish(message, cancellationToken);
}
There’s only one thing left - register the implementation in the DI container under MassTransit configuration:
builder.Services.AddScoped<IEventBus, EventBus>();Publish message
Let’s add our event bus to the endpoint we created before. This simple method will create a message with the current time and publish it to RabbitMQ. In this case, we’ll pass a simple event object with two properties - message and timestamp.
app.MapGet("/api/messages", async (IEventBus eventBus) =>
{
    var timeStamp = DateTime.Now;
    var message = $"Message sent to RabbitMQ - {timeStamp}";
    await eventBus.PublishAsync(new HelloEvent(message, timeStamp));
    return new { Message = message, TimeStamp = timeStamp };
});

public sealed record HelloEvent(string Message, DateTime? TimeStamp = null);
Testing solution
Okay, everything’s set. It’s time to test our solution. Start containers by running the command in the project folder root:
docker compose up -dOr by using the built-in Docker Compose runner in Visual Studio. If everything was set correctly, you should be able to see two containers in Docker Desktop as in the screenshot below.

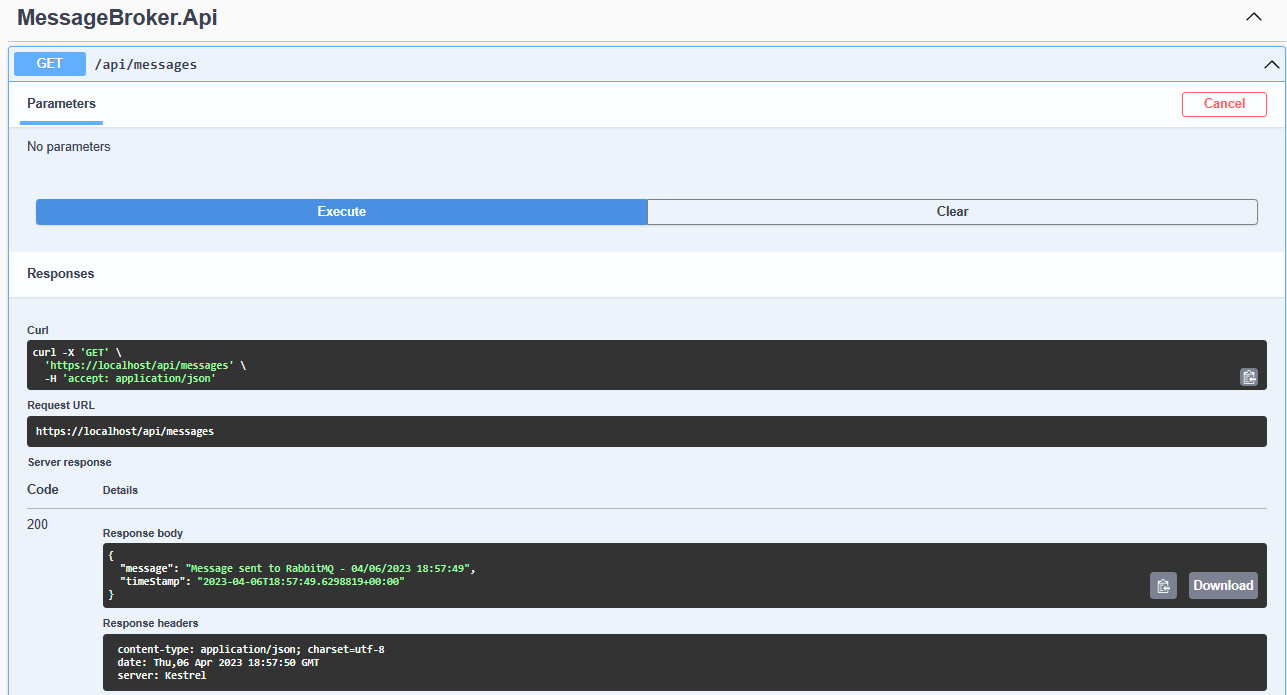
Go to the swagger URL in the browser (by default: https://localhost/swagger/index.html) and use its Try it out option to get the response from the endpoint. In the response, you should get the message and the current time stamp.
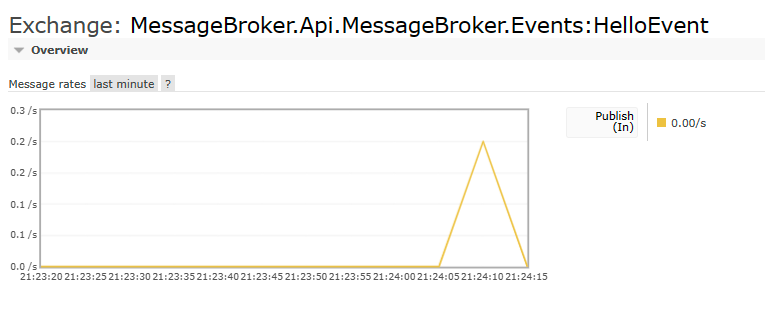
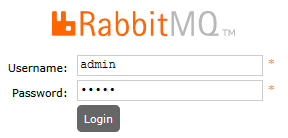
Ok, our endpoint is running correctly, so the last thing to check is if the RabbitMQ instance received the message produced by API. To do this, open the RabbitMQ admin panel in the browser (should be running on port 15672). Sign in using the credentials provided in the docker-compose file.
Go to the Exchanges tab and choose an exchange with your event name - in this case MessageBroker.Api.MessageBroker.Events:HelloEvent. You can see that the message published when you accessed the API endpoint was received by the message broker.