Posted: 1/16/2023
Minimal API is the new, simplified approach for building APIs in .NET, which is faster and requires minimal code and configuration. Below you can find a set of tips & tricks you may find useful while starting your journey with Minimal API or transforming your existing API from a controller approach into minimal.
First endpoint
The point of Minimal API is the ease of use and speed of implementation. With the “conservative” approach, you have to define at least one class (controller) or more often two (model and controller). With Minimal API, you need zero extra classes. You can define all in your Program.cs file (it is not the best approach considering further maintenance, but the point is that it is possible!).
To create your first endpoint, just add the following code snippet in the Program.cs file:
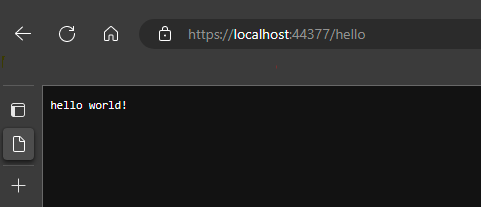
app.MapGet("hello", () => "hello world!");The code string defines the routing part, so the path where your endpoint is accessible (in the old MVC approach - controller name, e.g. HelloController). MapGet defines the HTTP method for the endpoint. Other methods are:
-
MapPost
-
MapDelete
-
MapPut
-
MapPatch
Lambda is the function that will be triggered when the endpoint is accessed. Simply - if you access the path /hello in your browser, you will see the hello world! text.
We can extend this endpoint by adding the parameter to the request. Just add it as a lambda parameter in your code:
app.MapGet("hello", (string name) => $"hello {name}!");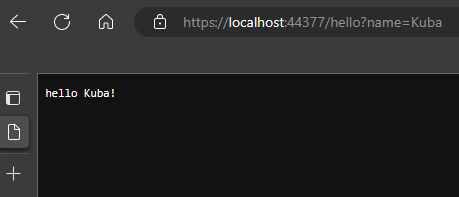
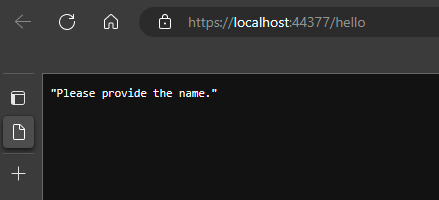
But what if the user does not provide the parameter? Of course, we would like to return an error code. For this purpose, use the static Results class with the corresponding error code, like in the example below:
app.MapGet("hello", (string? name) =>
{
    if(!string.IsNullOrWhiteSpace(name))
    {
        return Results.Ok($"hello {name}!");
    }
    else
    {
        return Results.BadRequest("Please provide the name.")
    }
});
Dependency injection
You might say: “It’s all nice and neat, but real controllers don’t look like that. They are much more complicated and dependent on other services” - and you are right. I can’t imagine a controller without external dependencies injected into it with interfaces. But it is also possible with minimal API and it is also easy. All you need to do is to register your interface implementation as you always do (in Program.cs or with a third-party library like Autofac). Then, just inject it into your endpoint definition with the [FromServices] attribute. Minimal API will resolve it the same way as in controller:
app.MapGet("hello", (\[FromServices\] ILogger logger, string? name) =>
{
    if(!string.IsNullOrWhiteSpace(name))
    {
        logger.LogInformation($"Name: {name}");
        return Results.Ok($"hello {name}!");
    }
    else
    {
        logger.LogError("Name not provided.");
        return Results.BadRequest("Please provide the name.");
    }
});
Authorization
What if you want to restrict access to your endpoint? In the MVC approach, you probably added the [Authorize] attribute to your method or whole controller. Minimal APIs are all about extension methods, and this is how it is for authorization - just add the .RequireAuthorization() extension method.
app.MapGet("hello", (\[FromServices\] ILogger logger, string? name) =>
{
    if(!string.IsNullOrWhiteSpace(name))
    {
        logger.LogInformation($"Name: {name}");
        return Results.Ok($"hello {name}!");
    }
    else
    {
        logger.LogError("Name not provided.");
        return Results.BadRequest("Please provide the name.");
    }
}).RequireAuthorization();
Documentation
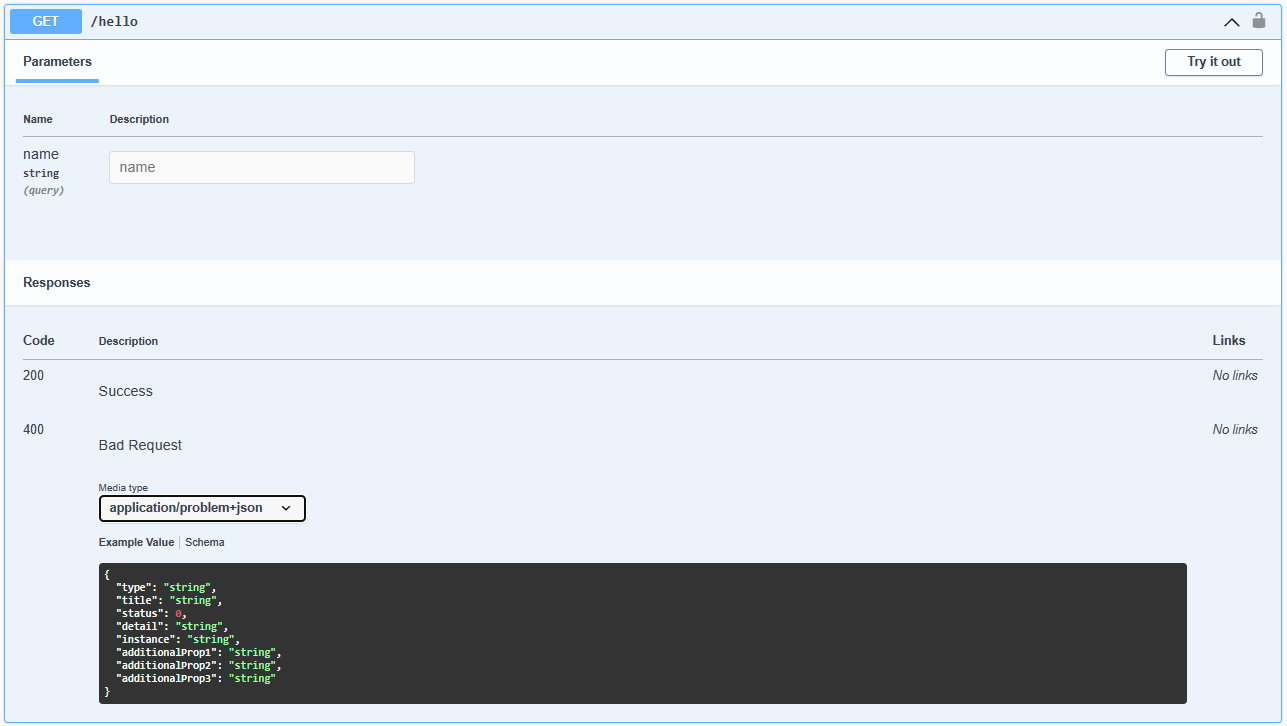
Your API is useless if you haven’t documented properly how to use it. With Swagger it became very easy and it became a permanent element of API projects written in .NET. To extend its documentation, I often used attributes like:
[ProducesResponseType(typeof(ApiResponse), StatusCodes.Status200OK)]
[ProducesErrorResponseType(StatusCodes.Status400BadRequest)]
To define what is the expected and error response code and type. We can also define it in Minimal API using .Produces and .ProducesProblem extension methods and their generic counterparts. The example is presented below:
app.MapGet("hello", (\[FromServices\] ILogger logger, string? name) =>
    {
        if (!string.IsNullOrWhiteSpace(name))
        {
            logger.LogInformation($"Name: {name}");
            return Results.Ok($"hello {name}!");
        }
        else
        {
            logger.LogError("Name not provided.");
            return Results.BadRequest("Please provide the name.");
        }
    })
    .RequireAuthorization()
    .Produces(StatusCodes.Status200OK)
    .ProducesProblem(StatusCodes.Status400BadRequest);
Will produce the following doc:
Summary
This is just a sneak peek of the features that you can find in the minimal APIs. More of them and also the more complex cases will be presented in the future. I hope this post has piqued your interest in minimal APIs in .NET and that you’ll give it a try in your next project ;)